How to set up a multichat overlay in OBS
Follow this step-by-step guide to put your combined StreamBuddy chat on stream with a transparent, read-only OBS Browser Source.
7 min read
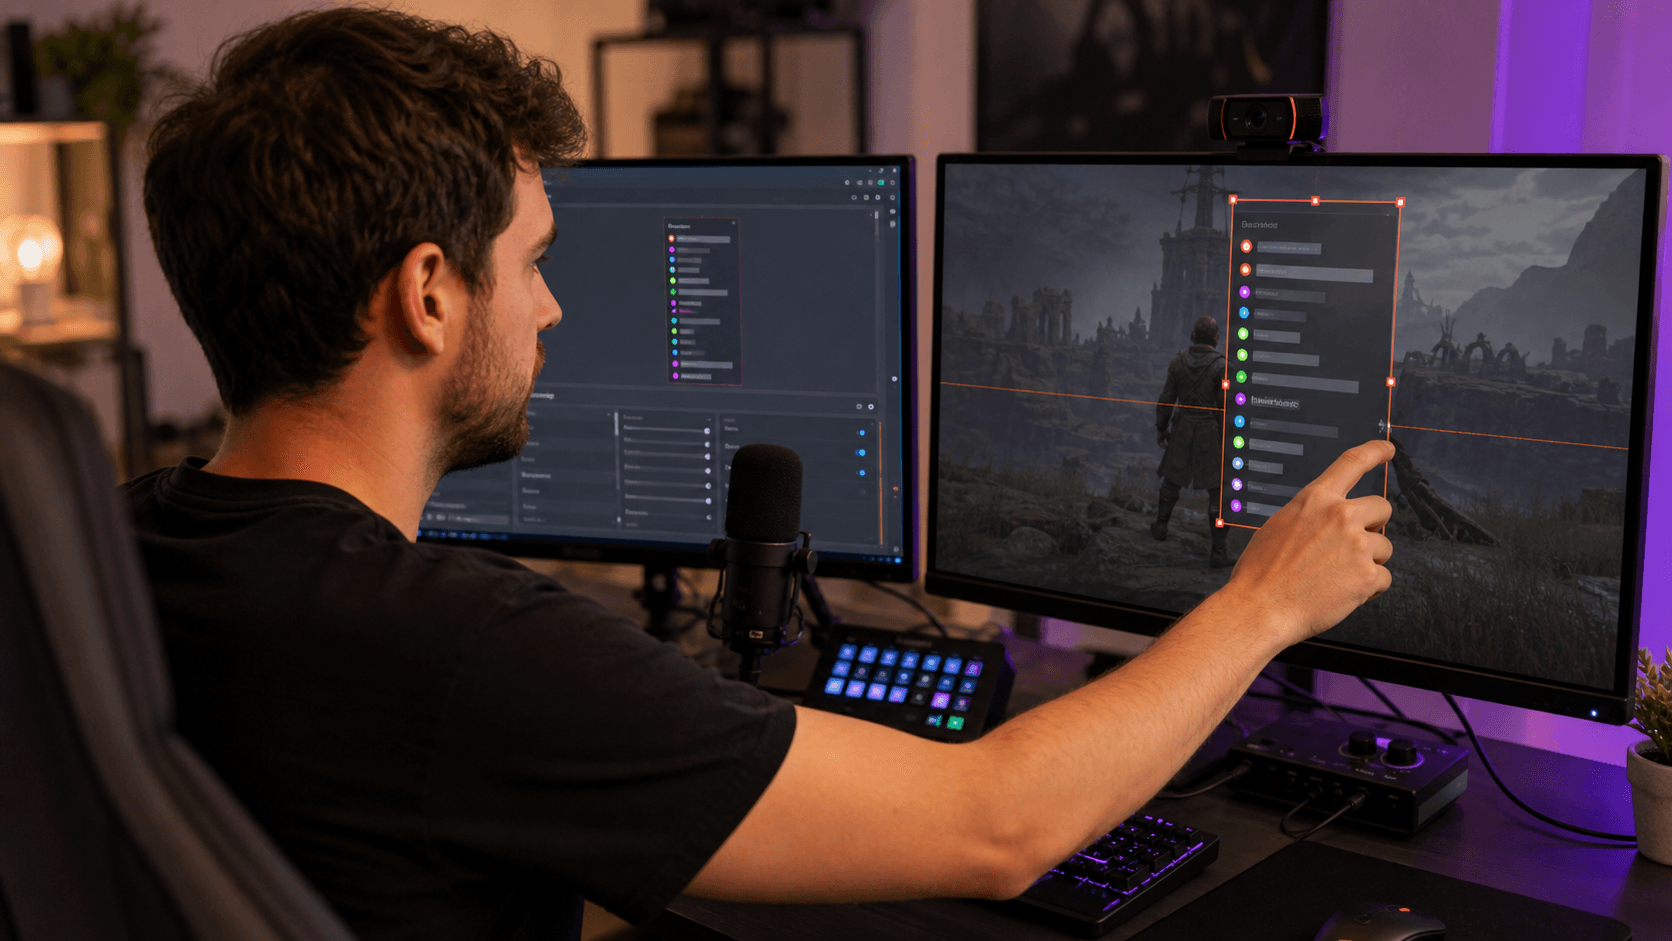
When you stream to more than one platform, each audience normally sees only its own chat. A YouTube viewer cannot see the Twitch message you just answered, and someone watching on Kick may miss the joke everyone else is reacting to.
A StreamBuddy multichat overlay puts the combined conversation directly on your broadcast. It arrives in OBS as one transparent Browser Source, keeps each message's platform identity, and updates as new messages reach your StreamBuddy chat.
This guide takes you from connected channels to a working on-stream overlay.
What you need before you start
Have these three things ready:
- A StreamBuddy account with the channels you want to include connected under Settings → Accounts
- OBS Studio with the scene you want to add chat to
- A little open space in that scene for a vertical chat panel
You do not need an OBS plugin, a local web server, or separate browser sources for each platform. StreamBuddy merges the messages before OBS renders them.
1. Create your StreamBuddy overlay link
- Open StreamBuddy and go to Settings.
- Select the Live tab.
- Scroll to Stream overlay & OBS dock.
- If this is your first overlay, select Create my links.
- Make sure Overlay enabled is turned on.
StreamBuddy creates two different links in this section:
| Link | Where it belongs | What it can do |
|---|---|---|
| Overlay link | An OBS Browser Source | Display chat on your broadcast; read-only |
| Dock link | OBS Docks → Custom Browser Docks | Open your private control panel for chatting and moderation |
For this guide, use only the link inside Overlay — this one goes on your stream. Select Copy overlay URL.
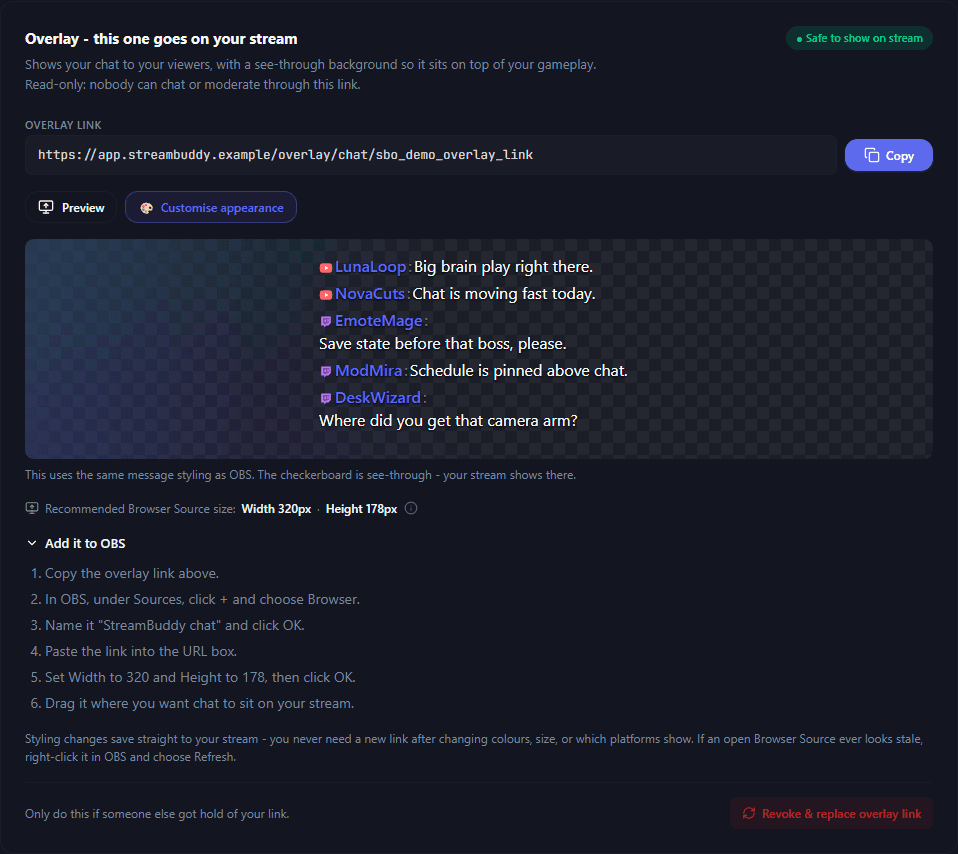
The overlay card keeps the stream-safe URL, preview, recommended dimensions, and OBS instructions together. The URL shown here is a demo.
2. Preview and style the chat
Before switching to OBS, select Preview to confirm that the overlay loads. The checkerboard in StreamBuddy represents transparency; your gameplay or camera will show through that area in OBS.
Select Customise appearance if you want to adjust the overlay. You can change:
- Theme, font, font size, background opacity, spacing, and text shadow
- The maximum number of messages and how quickly long messages wrap
- Which connected platforms appear in the overlay
- Platform icons, role badges, support events, and StreamBuddy viewer highlights
- Message backgrounds, borders, colors, and corner radius
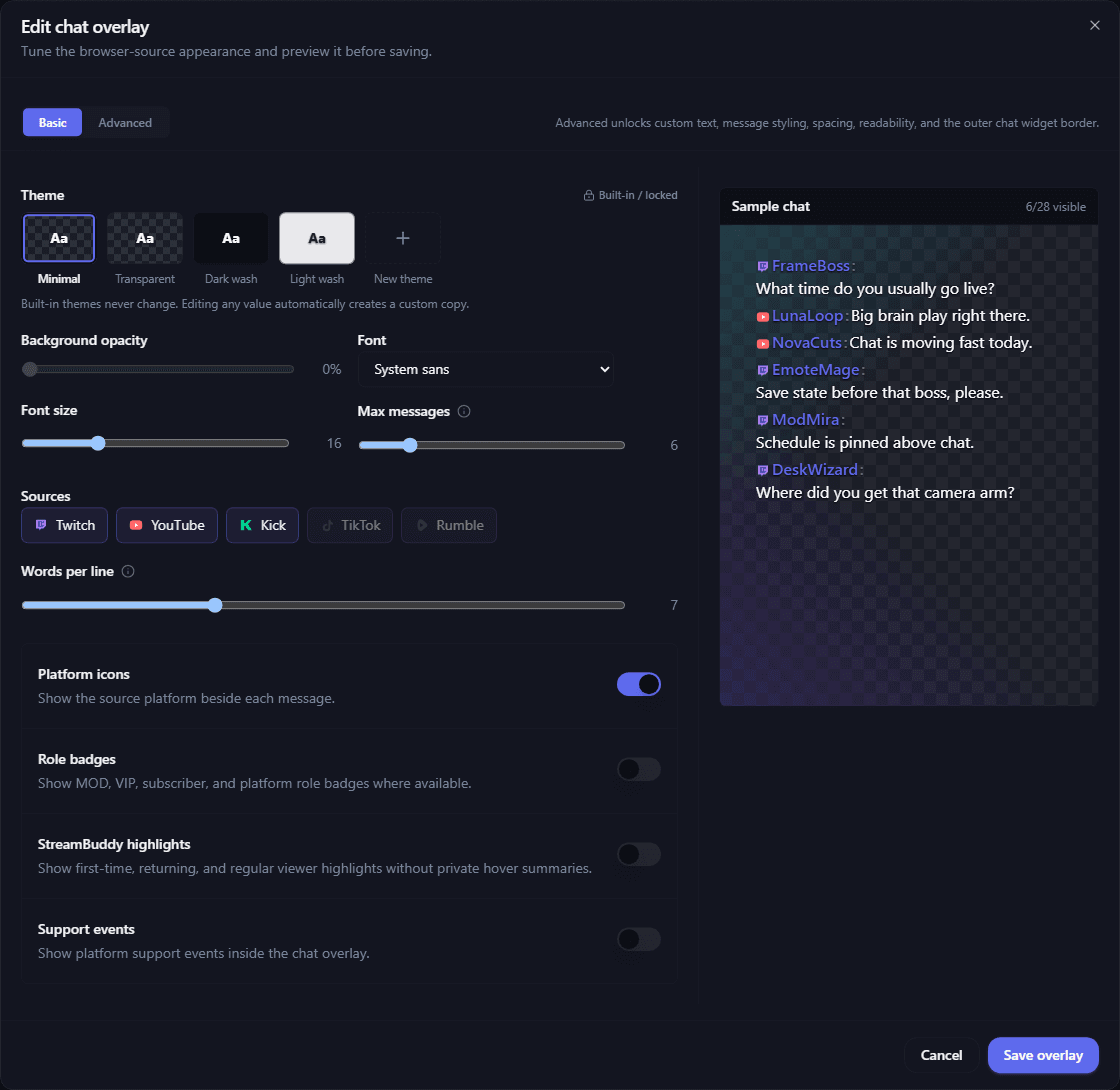
The appearance editor previews changes before they reach OBS. Unconnected platforms are dimmed and unavailable until you connect them.
Keep the preview readable over both the brightest and darkest parts of your scene. A text shadow or soft message background usually gives you the best protection against busy gameplay. When you are happy with it, select Save overlay.
Styling changes apply to the existing URL, so you will not need to replace the source in OBS each time you change the design.
3. Add the multichat overlay to OBS
Now move to OBS:
- In the Scenes panel, select the scene that should show chat.
- In Sources, select +.
- Choose Browser.
- Select Create new, name it
StreamBuddy chat, and select OK. - Delete the default address in the URL field and paste your StreamBuddy overlay link.
- Return to StreamBuddy and note the Recommended Browser Source size shown below the overlay preview.
- Enter those values in OBS's Width and Height fields.
- Select OK.
- Drag the source into position and resize it from the corners if needed.
The recommended dimensions respond to your font size, message count, spacing, and line-wrap settings. Use those numbers as your starting point rather than a generic 1920 × 1080 canvas. A tall, narrow source works well beside a face camera; a shorter, wider source usually fits better above a lower-third layout.
4. Put the source in the right layer
OBS draws sources from the bottom of the list upward. Keep StreamBuddy chat above the gameplay or camera source it should cover. If the chat is hidden, move it higher in Sources.
Use Edit Transform if you need precise positioning. Then lock the source with the padlock icon so it cannot move while you arrange the rest of the scene.
If you want the overlay in several scenes, copy the existing source and choose Paste (Reference). Every referenced copy will use the same StreamBuddy URL and stay in sync with the same appearance settings.
5. Test it before going live
Send a message in each connected channel and check the OBS preview. Confirm that:
- Messages from every intended platform appear
- Platform indicators are easy to distinguish
- Usernames and messages remain readable over the scene
- Long messages wrap inside the source instead of being cut off
- The newest messages remain visible at the bottom of the overlay
- No private StreamBuddy controls are visible
Record a short local test and watch it back. This catches text that looked readable in the editor but becomes too small after the stream is encoded or viewed on a phone.
Recommended OBS Browser Source settings
The StreamBuddy URL and its recommended dimensions do most of the work. For the remaining OBS options:
- Leave Shutdown source when not visible off if you want the source to stay connected while you change scenes.
- Turn on Refresh browser when scene becomes active only if you prefer the overlay to reload whenever you return to the scene.
- Keep the default custom CSS unless you have a specific reason to override the page; appearance is easier to manage from StreamBuddy.
- Use the OBS source crop controls only for scene composition, not to hide overflowing text. Adjust the StreamBuddy message count, wrapping, or recommended dimensions instead.
Troubleshooting
The overlay is blank
First confirm that Overlay enabled is on and that at least one selected platform is connected. Send a fresh test message—an empty overlay may simply have no current messages to display.
If the StreamBuddy preview works but OBS remains blank, right-click the Browser Source and choose Refresh. Then reopen Properties and paste the overlay URL again, making sure no spaces were added.
The background is not transparent
The live overlay is transparent by default. Make sure you copied the clean Overlay link, not the preview page from your browser's address bar. The preview adds a checkerboard only to make transparency visible while you customize it.
Chat is cropped or too small
Recheck the recommended width and height in StreamBuddy after changing the font, maximum messages, or words per line. Update both values in the OBS Browser Source properties, then use the red transform handles only for final placement.
One platform is missing
Open Customise appearance and confirm that the platform is selected. Then check its connection under Settings → Accounts and send a new message on that platform.
Styling changes do not appear
Saved design changes normally update the live source without a new URL. If OBS looks stale, right-click the source and select Refresh.
Keep your overlay link under control
The overlay is display-only: it cannot send replies, run moderation actions, or change your channels. Even so, the URL is a long-lived token that can load your rendered chat. Do not paste it in public chat or include it in screenshots of your OBS properties.
If someone gets the URL, use Revoke & replace overlay link in StreamBuddy, then paste the new link into OBS. Rotating the overlay link does not change your separate Dock link.
Once the test messages look right, your multichat overlay is ready. Viewers on every destination can now follow the same on-stream conversation—even when the messages originated somewhere else.
Put your whole chat on one stream
Connect your channels, customize a transparent multichat overlay, and add it to OBS with one browser-source URL.
Set up StreamBuddy- obs
- multichat
- overlay
- browser-source